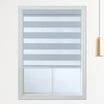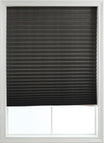
Instructions for shades
Step 1:
Before installing your shade, make sure all parts listed below are present. If any part is missing or damaged, please do not assemble, install, or operate
Contents include:
Brackets (2-3) and screws (4-6)
Handle (1)
Shade
Step 2:
Gather Additional Tools
Required: The following tools are not included,but will be needed to complete your installation.
Drill with 1/16-inch bit
Screwdriver
Level
Pencil
Step ladder
Step 3: Begin Installation
Mark location of shade and brackets
Outside Mount
Note that the shade may be installed either inside or outside the window frame.
Tip: Make sure mounting brackets and/or mounting surface are level, otherwise your shade could telescope during the lifting operation
Step 4. Drill Hole
Step 5. Screw in Brackets
Step 6. Mount Shade in Brackets
Side View Hang back of headrail channel onto the back of the clip.
Rotate headrail forward and up
Clips will click when secure
Step 7. Assembling the operation handle
Locate handle in the center of bottom rail.
Step 8. Operate the Shade
Standard lift
Cleaning instructions:
Lightly vacuum with a soft brush attachment or wipe with a duster
This collection is empty
Continue shopping


